
Welcome!
Be part of our community & join our international next generation forum now!
Categories
In this Discussion
- GD50 April 2018
- kimbodious April 2018
- punkin April 2018
- richard April 2018
[REVIEW] StillDragon DIY Element Controller Kit Large Box

By Courtesy Of @Ukioye
After using cheap but workable eBay controller for 18 months, I treated myself and upgraded to the StillDragon Element Controller box [Large].
Selected ‘Large’ as I wanted to add in a power meter and a 1-0-2 switch as per reading elsewhere on this forum.
@punkin was quickly efficient, as usual, and the goodies arrived pronto. It was another 10 days for the eBay parts to slowly trickle in – then it was all systems go!
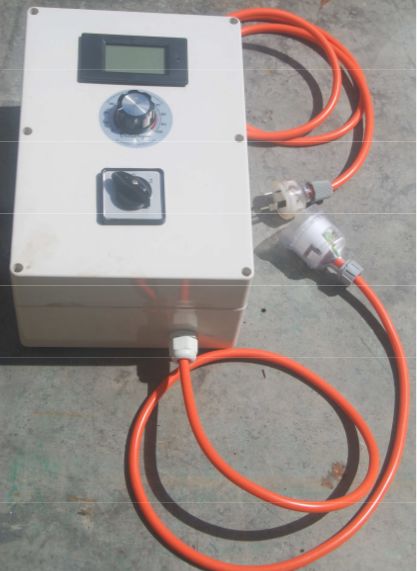
The overall aim was to end up with this panel layout.
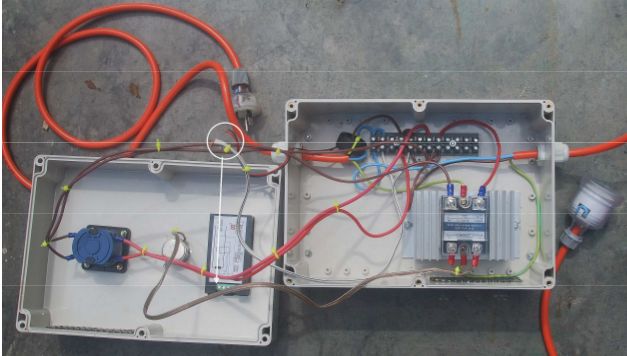
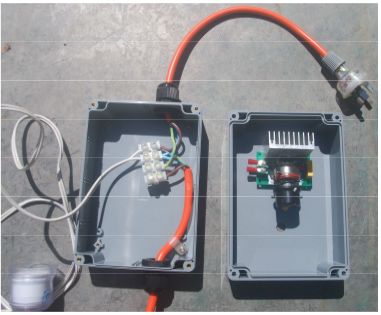
The StillDragon large box gave me more real estate to move about in and the overall layout was as this:
[the meter’s wires (circled) to the CT are not connected in this shot as they are very short.]
A few close-up and explainations:
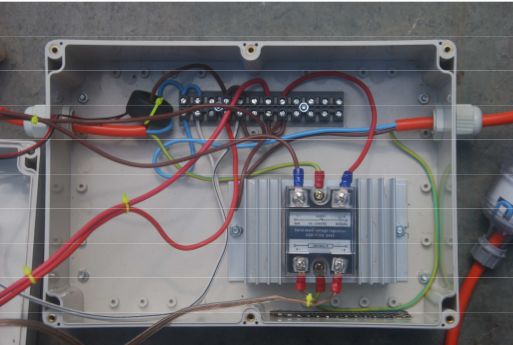
General layout; CT ring for power meter on the active [brown] at top left. I put it on the inbound [supply] active to include measuring the consumption of the SSR. You could put it on the outbound [load] active to tighten up the readings..but hey...
The CT ring is cable-tied to the active inbound – mostly to stop it flopping around. [Does not everyone dance around their distillery with the creation that they made?...OK call me weird]
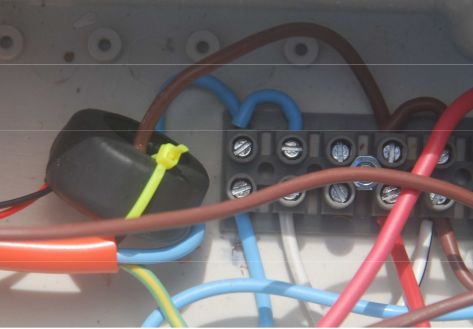
The terminal block is laid-out with current ‘input’ coming IN at top and ‘OUT’ at bottom of terminal block.
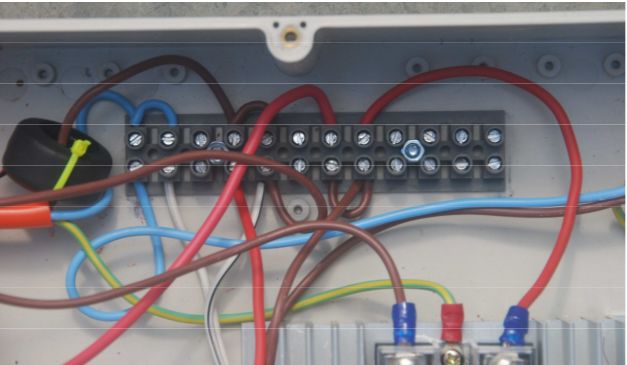
The addition of the 1-0-2 [aka break-before-make type switch] made the wiring way more complex..but doable. Not sure if it really adds anything to the performance, life or heat output but it was cool to do.
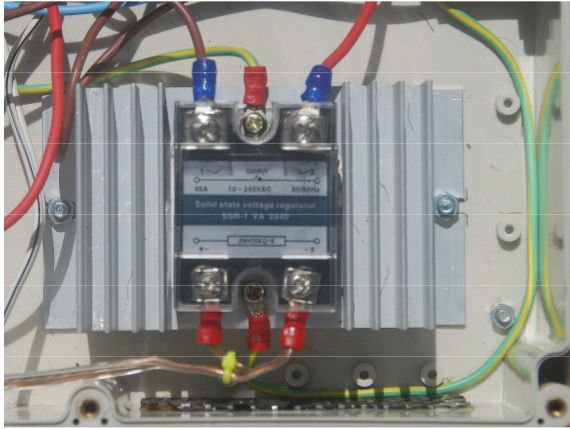
The StillDragon supplied SSR is top quality – the fittings, clear terminal cover, heat-sink size, heat paste–make it top quality. The best result of all their care and attention is that it that it becomes one less thing to concern about when the real aim is to get a top distillation output. This thing is not going to crap out.
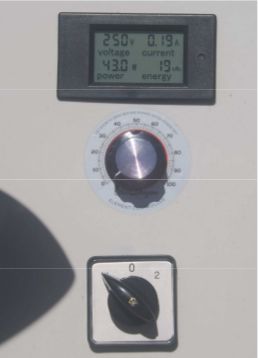
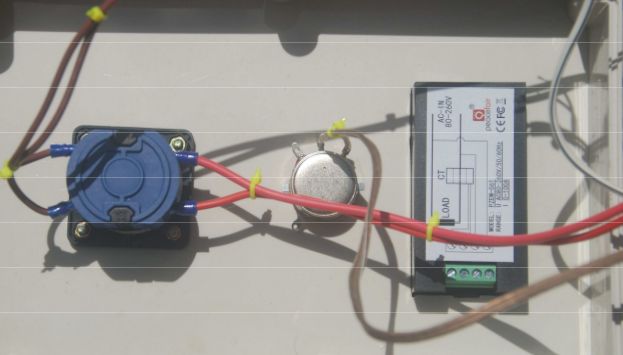
Interior of top panel – showing [L to R] the Ebay 1-0-2 switch [660V 16A 8 terminal], the StillDragon-supplied potentiometer and the (unconnected) eBay meter [PZEM-061]
So the whole thing goes together as this:
SMOKE TESTING
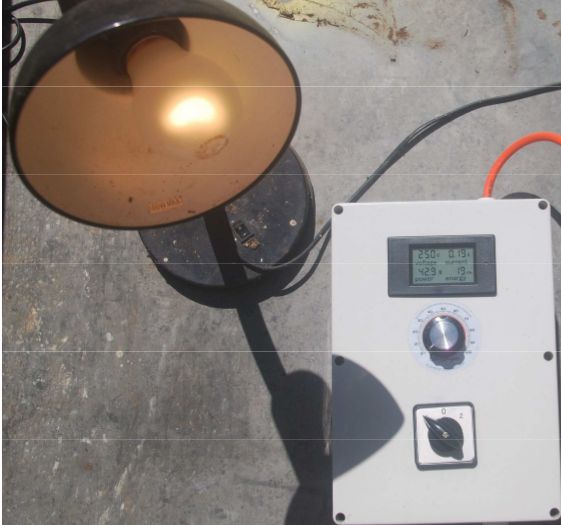
Under testing on a 40W lamp – using position ‘1’ on the switch.
This bypasses the SSR (see dial is set to 0%) and meter indicates a load of 42.9W
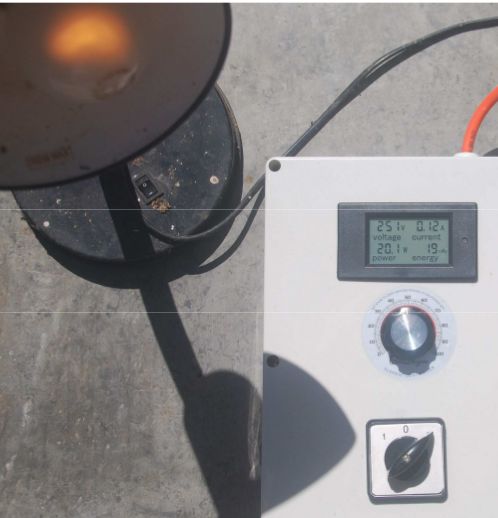
With current going through the SSR [via switch position ‘2’], and the StillDragon potentiometer set at 0%...well we get 1.8W – all being consumed by the SSR.

At 50% setting we get ~20W and a dim light bulb.
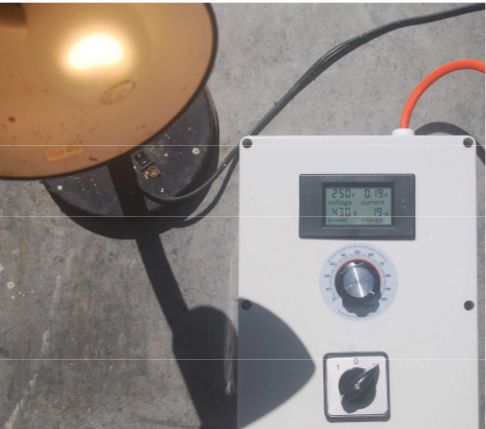
As expected 100% gives 43W and the light-bulb goes on bigtime!
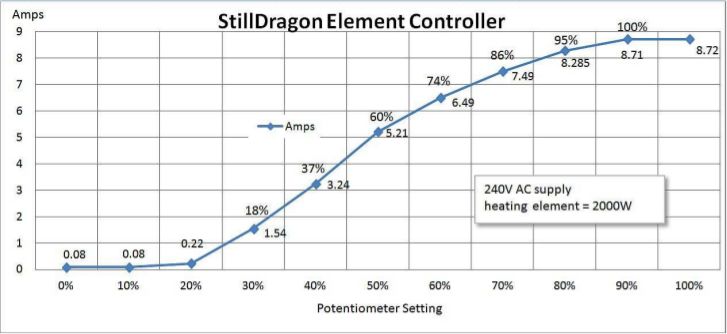
As an aside, I graphed the output Amps against the rotary dial settings.
The graph shows a typical S curvature...meaning that all the fine control is in the middle of the settings (where you want it) and anything above 90% is flat-out and below 20% is negligible.
All in all, this is an excellent piece of kit. The selection, collection and supply of all the parts is superb. The value is unbeatable, the quality is top notch.
As an aside – I later wanted to do a similar job to my ‘old’ controller – a cheapo eBay regulator:

I went along to JayCar [a RadioShack type place] and purchased cable glands, small enclosure Box (171x121x80mm), terminal block, some crimps and four rubber feet. [but no heat paste, no SSR]
The price came to AUD$50.80 – just AUD$9.21 less than the StillDragon large controller including the SSR! Needless to say, I went home and poured myself a stiff drink.
Do yourself a favour – get a StillDragon large controller for good value, good features, quality parts and piece of mind.
Ukioye, April 2018
Download: StillDragon DIY Element Controller Kit Large Box Review (PDF)
Your Place to be >>> www.StillDragon.org <<< Home of the StillDragon® Community Forum
Comments
Love the 4 part display
Great stuff mate and thanks to Moonshine for the post.
StillDragon Australia & New Zealand - Your StillDragon® Distributor for Australia & New Zealand
Very informative post with great photographs. The 3 position cam switch is a great idea giving you the option to bypass the SSR when you don't require it for the initial heating up or a fully on stripping run!
Is a great post but a possible recommendation.
Maybe I have it wrong but, those wire sizes for both IN and OUT look a bit small .... something like 1-1.5mm2.
I love belts and braces approach on wiring supply and I even though in excess, would have gone at least 4mm2. This increase will cost you almost nothing and will do you well going forward not having to worry about wires getting hot and burning through.
Bit hard to wire 4 mm2 into a 10 amp plug and socket though. To do that you would need to use commercial outlets. I understand the thought but too hard for a hobby distiller.
The builder mostly used the wires from the power lead which would either be rated at 10 or 15A